

I started on my new ZX-81 replacement board (kit) ZX81+38
Re: I started on my new ZX-81 replacement board (kit) ZX81+38
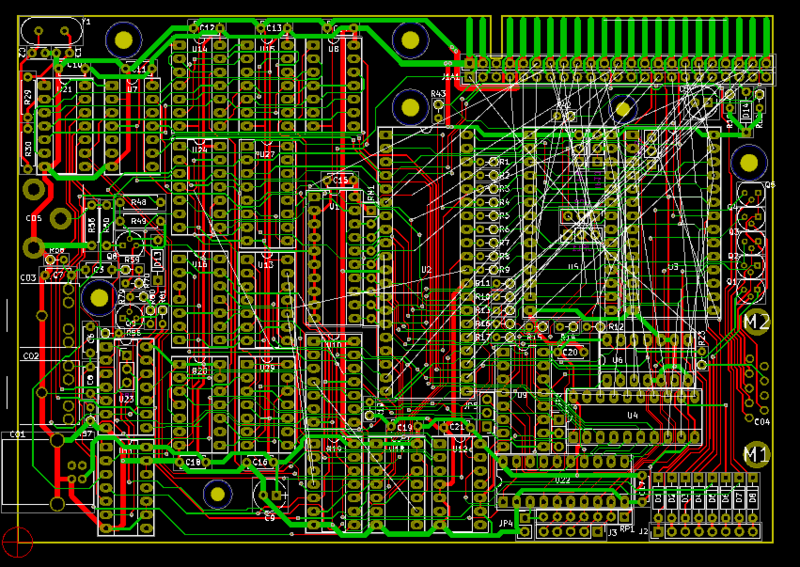
The layout is coming along nicely, here is a preview, the white lines (ratsnest) are the connections I have yet to make:
Re: I started on my new ZX-81 replacement board (kit) ZX81+38
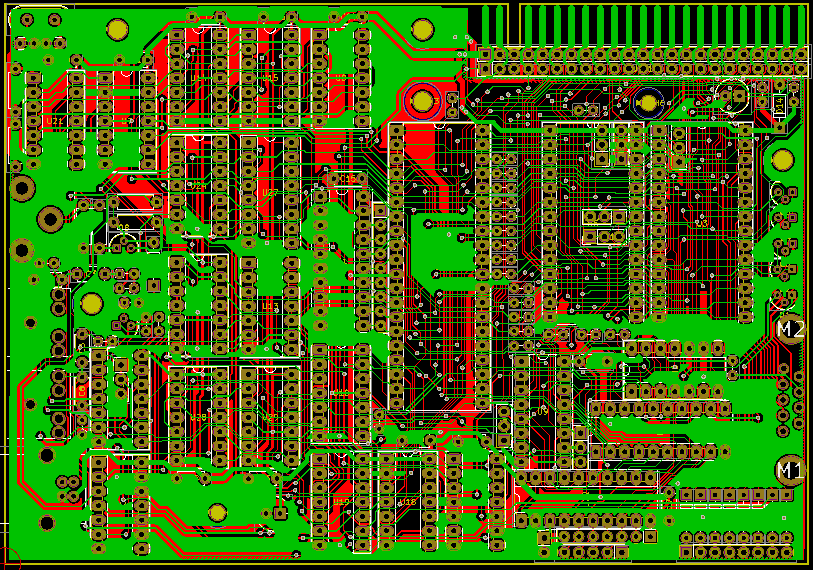
I have made 100% all connections. The expansion port is not fully wired, but enough for I / O devices such as the printer, and programmable sound generators and the like. I'm going to add ground planes on both sides.
-
1024MAK

- Posts: 5529
- Joined: Mon Sep 26, 2011 10:56 am
- Location: Looking forward to summer in Somerset, UK...
- Contact:
Re: I started on my new ZX-81 replacement board (kit) ZX81+38
Looking a lot better 
Mark
Mark
ZX81 Variations
ZX81 Chip Pin-outs
ZX81 Video Transistor Amp
 Standby alert
There are four lights!
Step up to red alert. Sir, are you absolutely sure? It does mean changing the bulb
Spring approaching...
ZX81 Chip Pin-outs
ZX81 Video Transistor Amp
There are four lights!
Step up to red alert. Sir, are you absolutely sure? It does mean changing the bulb
Spring approaching...
Re: I started on my new ZX-81 replacement board (kit) ZX81+38
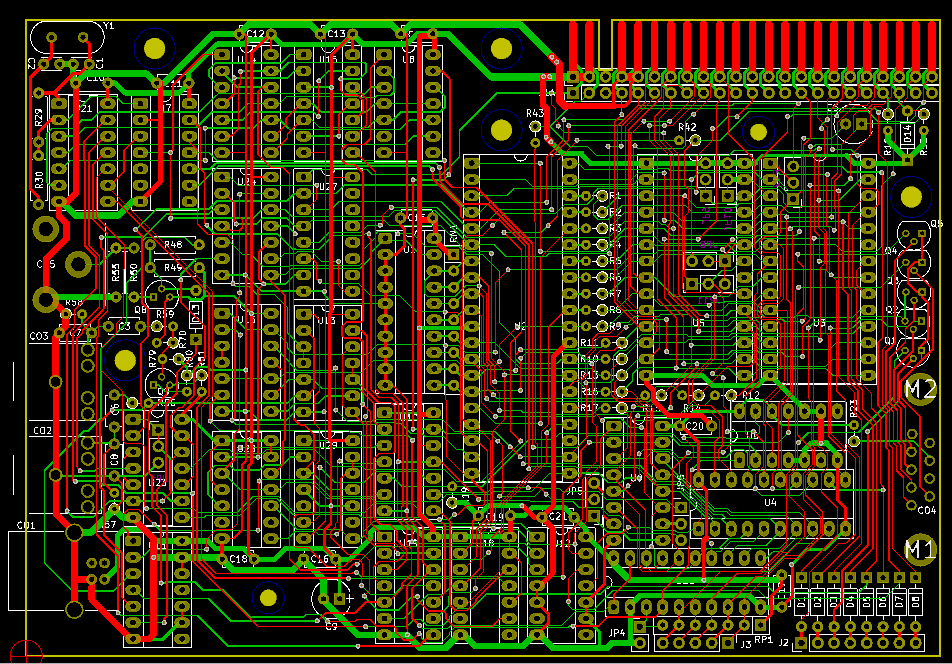
Almost finished, only nBUSACK and nWAIT have not yet been routed to the expansion port. The layout is now quite "busy". 
Next week I will attempt to do the two missing connections.
Next week I will attempt to do the two missing connections.
Re: I started on my new ZX-81 replacement board (kit) ZX81+38
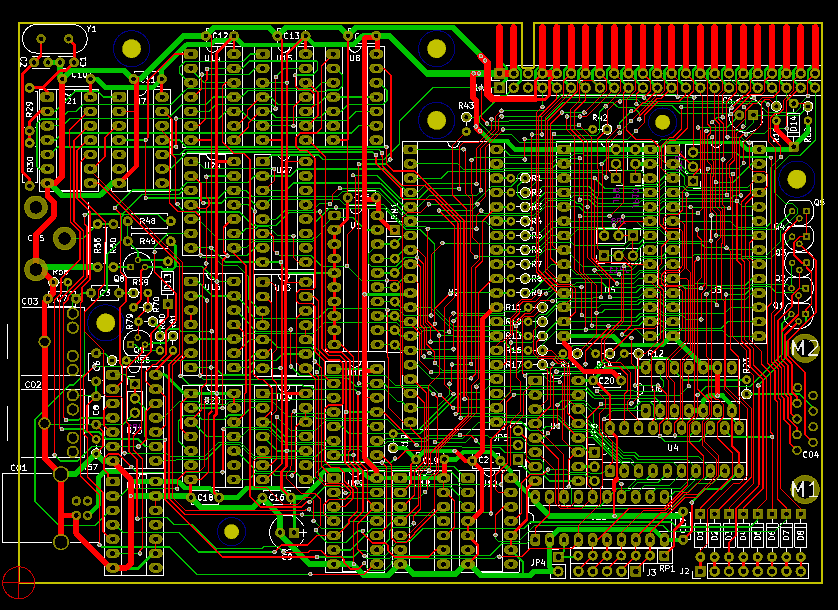
Finished the last two remaining signals, and applied copper fills. Next is to tweak solder mask and silk screen:
Re: I started on my new ZX-81 replacement board (kit) ZX81+38
And this is how the PCB will look like:
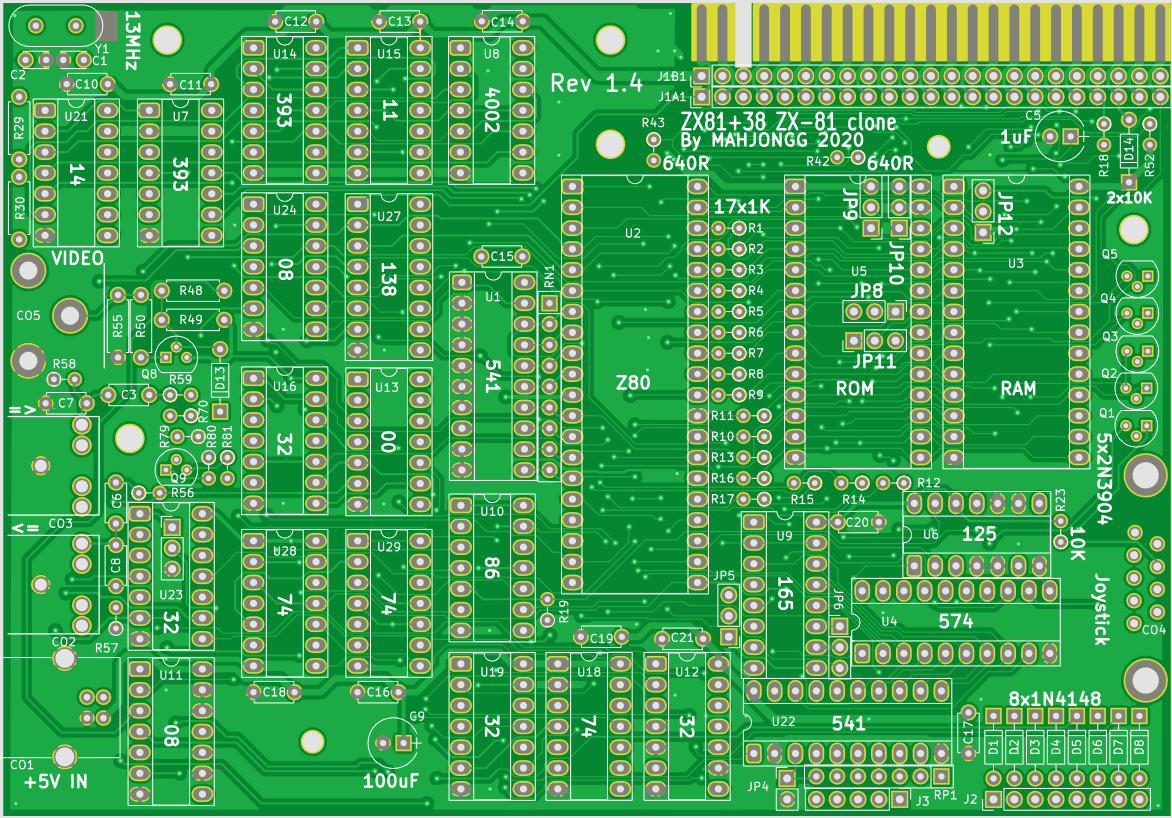
Next up, ordering the PCB's (ZX81+38 and keyboard PCB) and testing it.
Next up, ordering the PCB's (ZX81+38 and keyboard PCB) and testing it.
Re: I started on my new ZX-81 replacement board (kit) ZX81+38
What does the keyboard pcb look like?
Re: I started on my new ZX-81 replacement board (kit) ZX81+38
It will look like this:
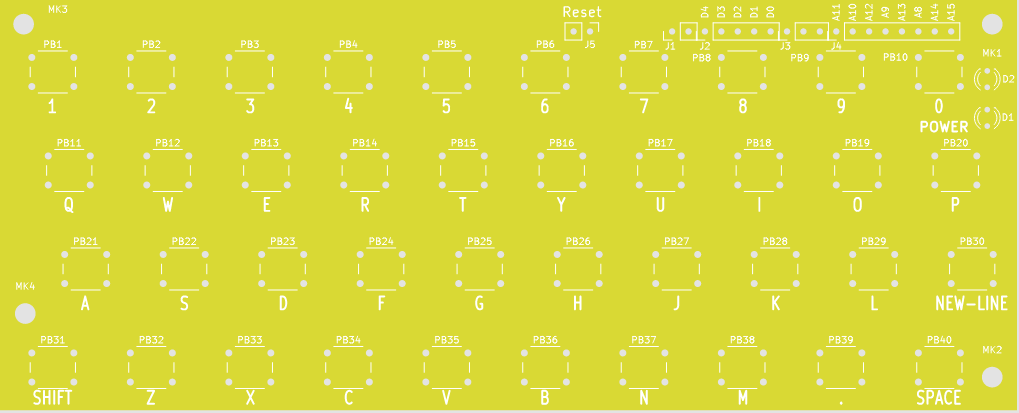
just with some superfluous stuff removed (reset button and LED's). I also designed a keyboard overlay.
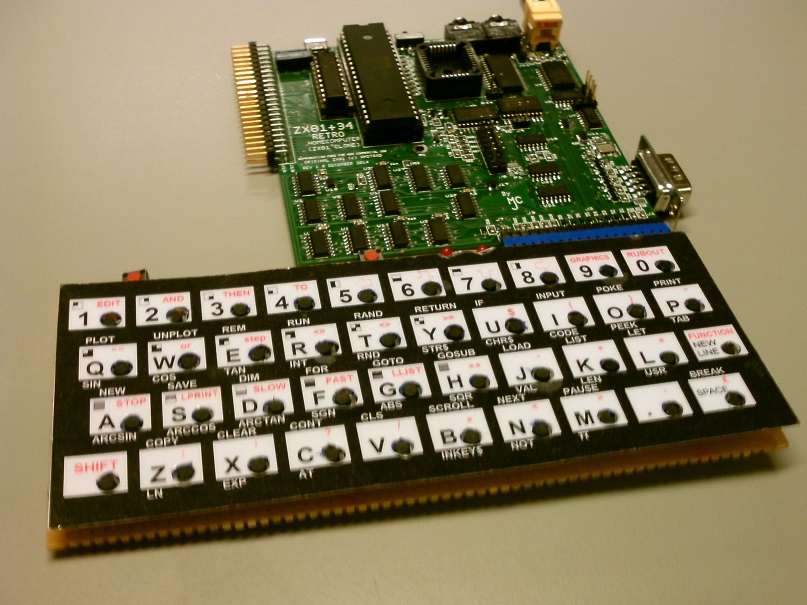
Here you can see a prototype, together with my older ZX-81 clone, built from SMT components.
just with some superfluous stuff removed (reset button and LED's). I also designed a keyboard overlay.
Here you can see a prototype, together with my older ZX-81 clone, built from SMT components.
-
nollkolltroll
- Posts: 351
- Joined: Sat Sep 27, 2014 8:02 pm
- Location: Stockholm, Sweden