Creating Wilf Rigter's ZXKBD v3

Discussions about Sinclair ZX80 and ZX81 Hardware
User avatar
mrtinb
Posts: 1910
Joined: Fri Nov 06, 2015 5:44 pm
Location: Denmark
Contact:

Re: Creating Wilf Rigter's ZXKBD v3

Post by mrtinb »

siggi wrote: Using a transistor or an analog switch, one key can "press" multiple ZX81 key at once.
Here is an example I use to have "Backspace" (BS) and "/" on a single key:

http://forum.tlienhard.com/phpBB3/viewt ... sten#p8838


I looked at the Maplin instruktions yesterday evening and found that two 4066 would do the trick.

/Martin
Martin
https://zx.rtin.be
ZX81, Lambda 8300, Commodore 64, Mac G4 Cube
User avatar
mrtinb
Posts: 1910
Joined: Fri Nov 06, 2015 5:44 pm
Location: Denmark
Contact:

Re: Creating Wilf Rigter's ZXKBD v3

Post by mrtinb »

image.jpeg
(545.58 KiB) Downloaded 435 times
Now comes the soldering part.

/Martin
Martin
https://zx.rtin.be
ZX81, Lambda 8300, Commodore 64, Mac G4 Cube
User avatar
mrtinb
Posts: 1910
Joined: Fri Nov 06, 2015 5:44 pm
Location: Denmark
Contact:

Re: Creating Wilf Rigter's ZXKBD v3

Post by mrtinb »

I finally found my ZX81 in the basement.

I didn't power it up for a day, to make it adjust for the temperature.

When I powered it up, the great [K] apreared. After 5 minutes the [K] disapeared and the screen was white.

Somehow my dear computer only worked for 5 minutes. :cry:

I found a diagnostics page http://www.worldofspectrum.org/hardware/rep3.html and ordered a digital probe to figure out which IC is broken.

Project is set back another month.

/Martin
Martin
https://zx.rtin.be
ZX81, Lambda 8300, Commodore 64, Mac G4 Cube
User avatar
PokeMon
Posts: 2264
Joined: Sat Sep 17, 2011 6:48 pm

Re: Creating Wilf Rigter's ZXKBD v3

Post by PokeMon »

Maybe it is just the power regulator (7805).
This could get some hot.
User avatar
mrtinb
Posts: 1910
Joined: Fri Nov 06, 2015 5:44 pm
Location: Denmark
Contact:

Re: Creating Wilf Rigter's ZXKBD v3

Post by mrtinb »

PokeMon wrote:Maybe it is just the power regulator (7805).
I've used a volt-meter on it this evening, and it looks ok. I'll have to wait until the digital probe is in the mail, so I can test the ICs.

/Martin
Martin
https://zx.rtin.be
ZX81, Lambda 8300, Commodore 64, Mac G4 Cube
User avatar
mrtinb
Posts: 1910
Joined: Fri Nov 06, 2015 5:44 pm
Location: Denmark
Contact:

Re: Creating Wilf Rigter's ZXKBD v3

Post by mrtinb »

It's the soldering going on here. I have 3 prints: Left keyboard, right keyboard and controller.

Soldering on the edge-connector from Pokemon, I realized a design flaw. There is not space for the ICs when the board is connected to the ZX81. :(

I'm trying to desolder the edge-connector. (Desoldering the edge-connector is not easy)
IMG_0057.jpg
IMG_0057.jpg (48.66 KiB) Viewed 4310 times
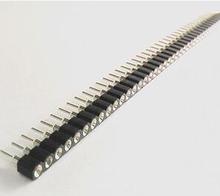
And I'll add pin headers (maybe multiple) before adding the edge-connector again. This way the print will be longer away from the ZX81, and the ICs will fit there.

Image
Martin
https://zx.rtin.be
ZX81, Lambda 8300, Commodore 64, Mac G4 Cube
User avatar
1024MAK
Posts: 5118
Joined: Mon Sep 26, 2011 10:56 am
Location: Looking forward to summer in Somerset, UK...

Re: Creating Wilf Rigter's ZXKBD v3

Post by 1024MAK »

You could use one of these http://www.sellmyretro.com/offer/details/2738 (when PokeMon returns back from holiday).

ZX81 Variations
ZX81 Chip Pin-outs
ZX81 Video Transistor Buffer Amp

:!: Standby alert :!:
There are four lights!
Step up to red alert. Sir, are you absolutely sure? It does mean changing the bulb :!:
Looking forward to summer later in the year.
User avatar
mahjongg
Posts: 181
Joined: Tue Nov 24, 2015 10:25 pm

Re: Creating Wilf Rigter's ZXKBD v3

Post by mahjongg »

or perhaps the board will fit if you use the IC's without a socket. its far easier to remove the IC sockets without damage to the PCB than the edge connector.
User avatar
1024MAK
Posts: 5118
Joined: Mon Sep 26, 2011 10:56 am
Location: Looking forward to summer in Somerset, UK...

Re: Creating Wilf Rigter's ZXKBD v3

Post by 1024MAK »

mrtinb wrote:I'm trying to desolder the edge-connector. (Desoldering the edge-connector is not easy)
Do you have an electric hot air gun (the type sold in DIY stores for stripping paint)?
If you are careful, you can use a metal vice or similar to hold the PCB vertically, then gently warm up the solder side using the hot air gun. Sweep from one end of the connector to the other, back and fourth. As soon as you see the solder start to melt, use a pair of pliers to gently pull the edge connector (hold the middle). Continue moving the hot air gun to apply heat to all the solder joints. Very soon the whole edge-connector will come free.

As long as you don't hold the hot air gun in one place for too long, the PCB will not be damaged.

I have done this a number of times now, either to desolder a large DIL chip, or to recover edge connectors from old computer boards.

Mark
ZX81 Variations
ZX81 Chip Pin-outs
ZX81 Video Transistor Buffer Amp

:!: Standby alert :!:
There are four lights!
Step up to red alert. Sir, are you absolutely sure? It does mean changing the bulb :!:
Looking forward to summer later in the year.
User avatar
mrtinb
Posts: 1910
Joined: Fri Nov 06, 2015 5:44 pm
Location: Denmark
Contact:

Re: Creating Wilf Rigter's ZXKBD v3

Post by mrtinb »

mahjongg wrote:or perhaps the board will fit if you use the IC's without a socket. its far easier to remove the IC sockets without damage to the PCB than the edge connector.
1024MAK wrote:Continue moving the hot air gun to apply heat to all the solder joints. Very soon the whole edge-connector will come free.
Thanks for your suggestions.

I think I'll try to get a ZX81XT from Pokemon first.
Martin
https://zx.rtin.be
ZX81, Lambda 8300, Commodore 64, Mac G4 Cube
Post Reply