Partial failure, partial success.
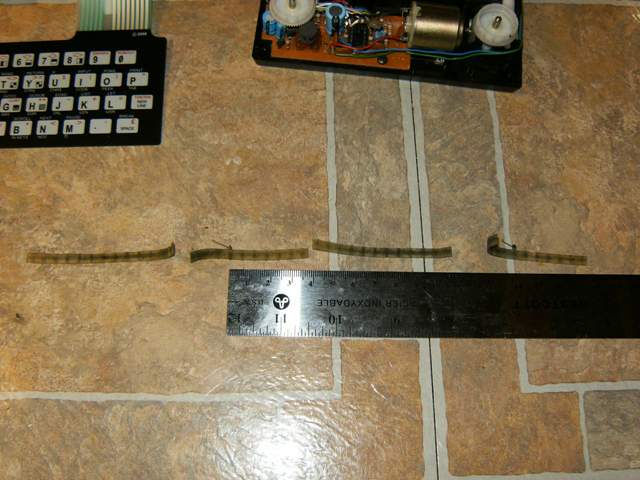
I tried, and failed, to repair the original belt.
My method of splicing the original belt using sections of VCR belt was working for a splice or two, but it turned out I had altogether too many breaks, and weak spots which turned into breaks during handling. I could not keep up.
- HPIM1535_3.jpg (43.69 KiB) Viewed 11499 times
- HPIM1539_3.jpg (41.95 KiB) Viewed 11499 times
For example, prior to using the Krazy Glue on a given section of belt, I tried to clean the heavy coating of black dust from it with alcohol and a Q-Tip so that the glue would work. Even that simple act caused more breaks. Worse, I would tend to break the belt right next to a splice I was working on, and having glued the repair belt over the original break, there was no more room to piggy-back more repair belt onto the second break.
It multiplied and got bad fast. Oh well--nothing ventured nothing gained.
Fortunately I had 2 salvaged VCR belts to begin with, and had deliberately used the thinner one. So belt 2 was earmarked to try the method as originally laid out in the website linked previously.
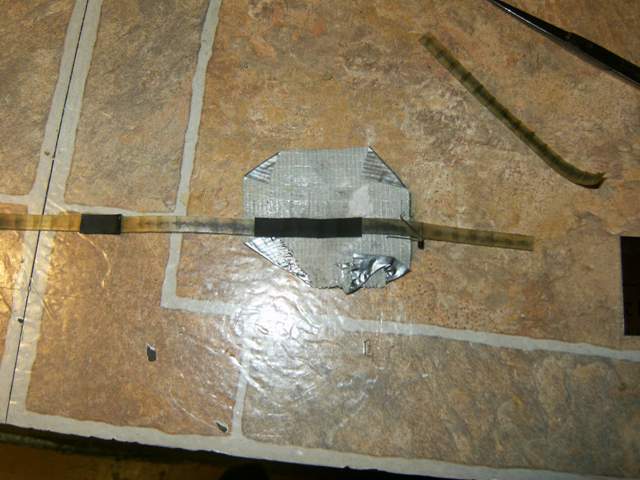
I got carried away and forgot to take pictures of my staples. Sorry. Rich's second diagram is perfect though. That's what you aim for.
Lessons learned on Fabio Rizzo's method:
Practice stapling on an extra piece of belt if you have one, or even a piece of paper if you don't. Mark the paper and try to hit the mark. The skill you need to acquire is knowing exactly where the staple will end up, simply by looking at the position of the stapler. This is harder than it sounds. You need to be right on the mark, and only experiment will tell you exactly where the staple comes out just by looking at the stapler orifice.
Getting the staple trimmed and holding fast to the belt was easier than I had feared. A careful squeeze with a pair of needle-nose and all was well.
A piece of insulation from the inner wires of a Cat5 cable are the right diameter for the spring section of the styli, to centre it, but not to cap it. I glued mine for the time being. I may re-address it in future.
My belt was wider than ideal. I trimmed it (very carefully) with a pair of surgical scissors.
My belt was also significantly thinner that the one originally used by Fabio. I had zero confidence that a butt splice would hold. So I did an overlap splice. The pullys seem content with this.
Ah, but be careful. The end result must be 275 mm with the styli 137.5 mm apart. Mine are not quite precise, and I think that is the source of distortion at the end of each line in my results. (The error seems to accumulate from left to right across the line.)
If you use a whole belt which stretches slightly to the correct length, (usually a good thing), your measurements will be difficult. If I had to do that, I think I'd place the belt on the pullys, and then mark the two halfway points on the pullys, i.e. the two points of apogee. That should work.
So here's my results. It doesn't look perfect, but then it never did. I have another printer I bought in the 80's which has
not been repaired, and it misplaces pixels too. If anything, this repaired one is slightly better because the beginning of each line is very clear. Go figure. As gozzo said somewhere, it's a wonder these little printers work at all.

- HPIM1540_3.jpg (98.82 KiB) Viewed 11499 times
I don't know how long it will last. But then again, I am loathe to print anything on the irreplaceable paper anyway. Like everything Zeddy, this whole project was "just because".
Cheers,
Ian